How to set up VPN connection under Honeycomb?
Last updated on October 17th, 2011 in Setup
For all of you are wondering if and how to make HideIP VPN work on your brand, new Honeycomb tablet we have a small tutorial. Also, if you hesitated because of this fear no more! We got our hands on one of the thinnest tablets currently out there – Galaxy Tab 10.1. It is running Android Honeycomb 3.1 and 2 core Nvidia Tegra 2 SOC. As most new tablets (not counting iPad) run the same system you will have no trouble to follow these steps regardless fo the tablet you use So, if you own (or plan to own) Asus Transformer, Samsung Galaxy Tab 10.1 / 8.9 /7.7 or one of the Acer’s Iconias and are interested in our VPN service read more…
We will start with “Home Screen” (here it is with Samsung’s own Touch Wiz interface):

Select “Apps” (look in top, right corner) and look for the settings icon, once there make sure you are under “Wireless and Networks”.

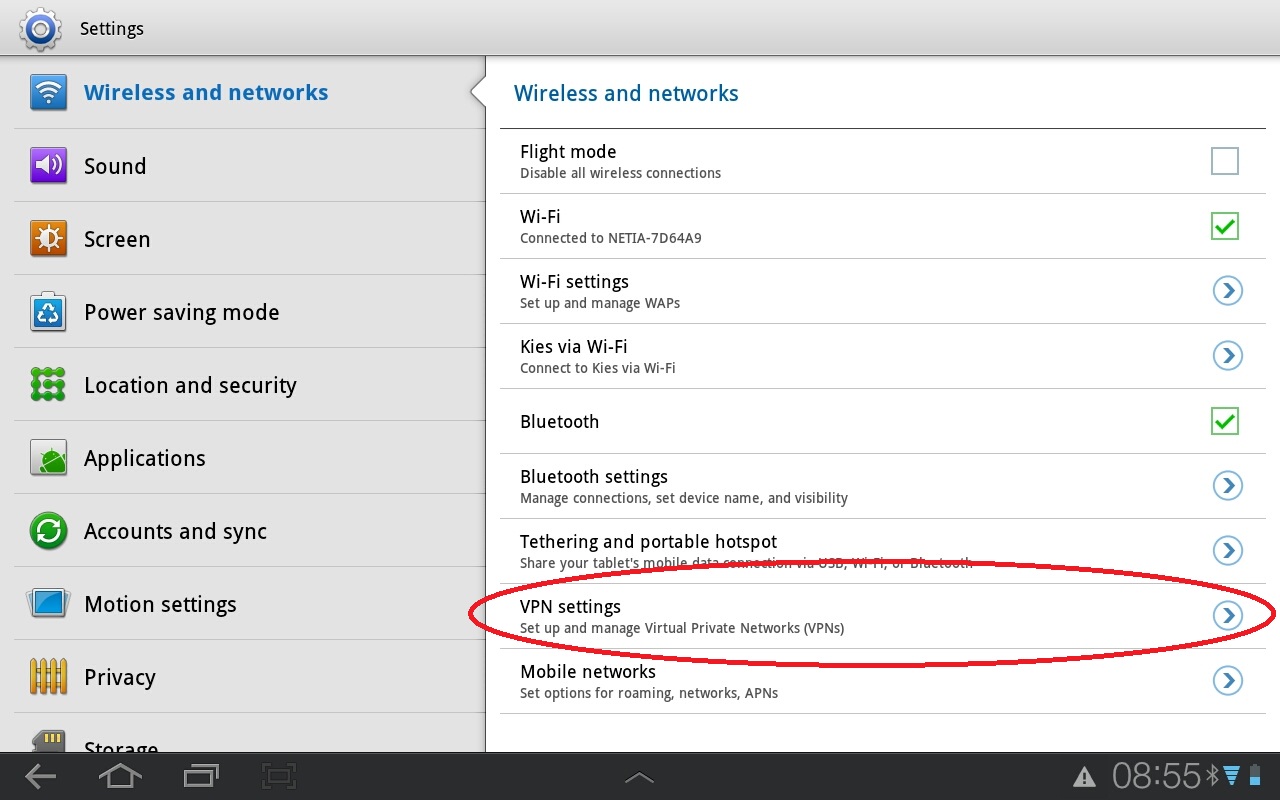
Choose “VPN Settings”
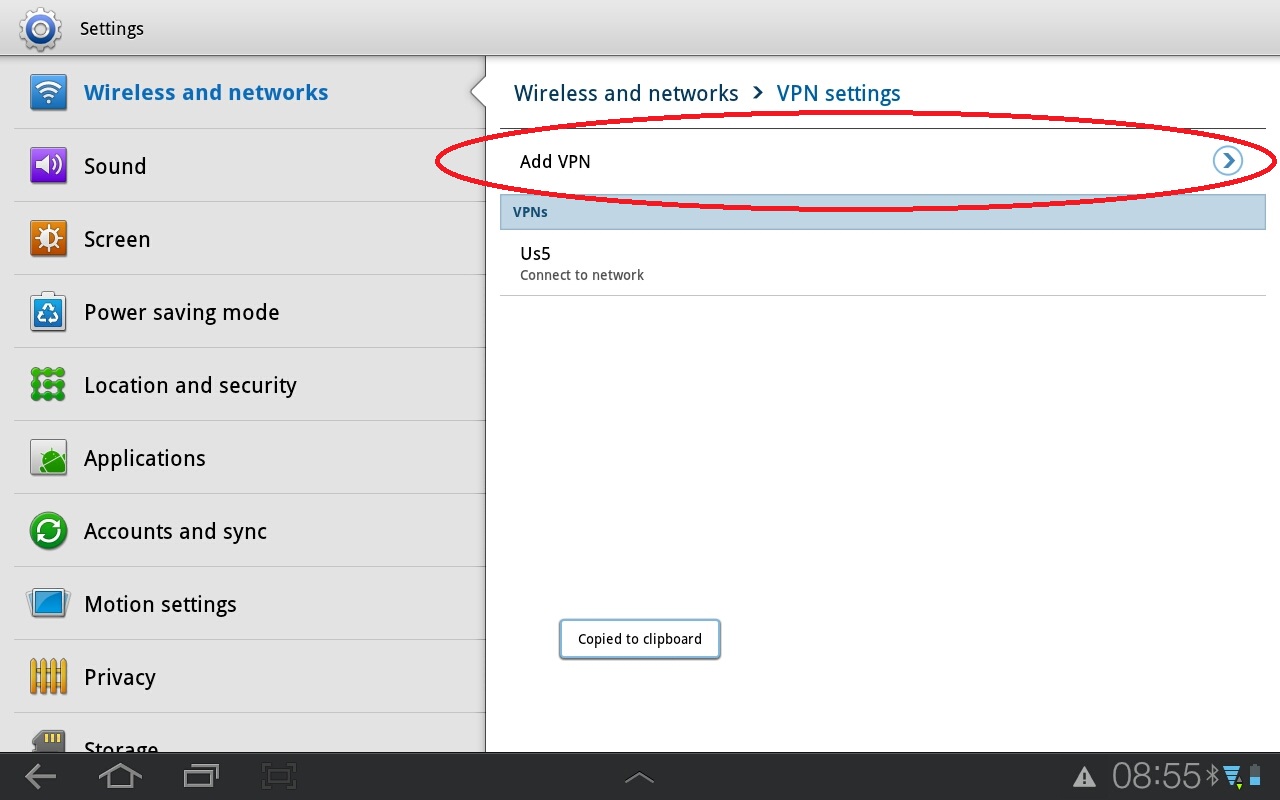
Choose “Add VPN”
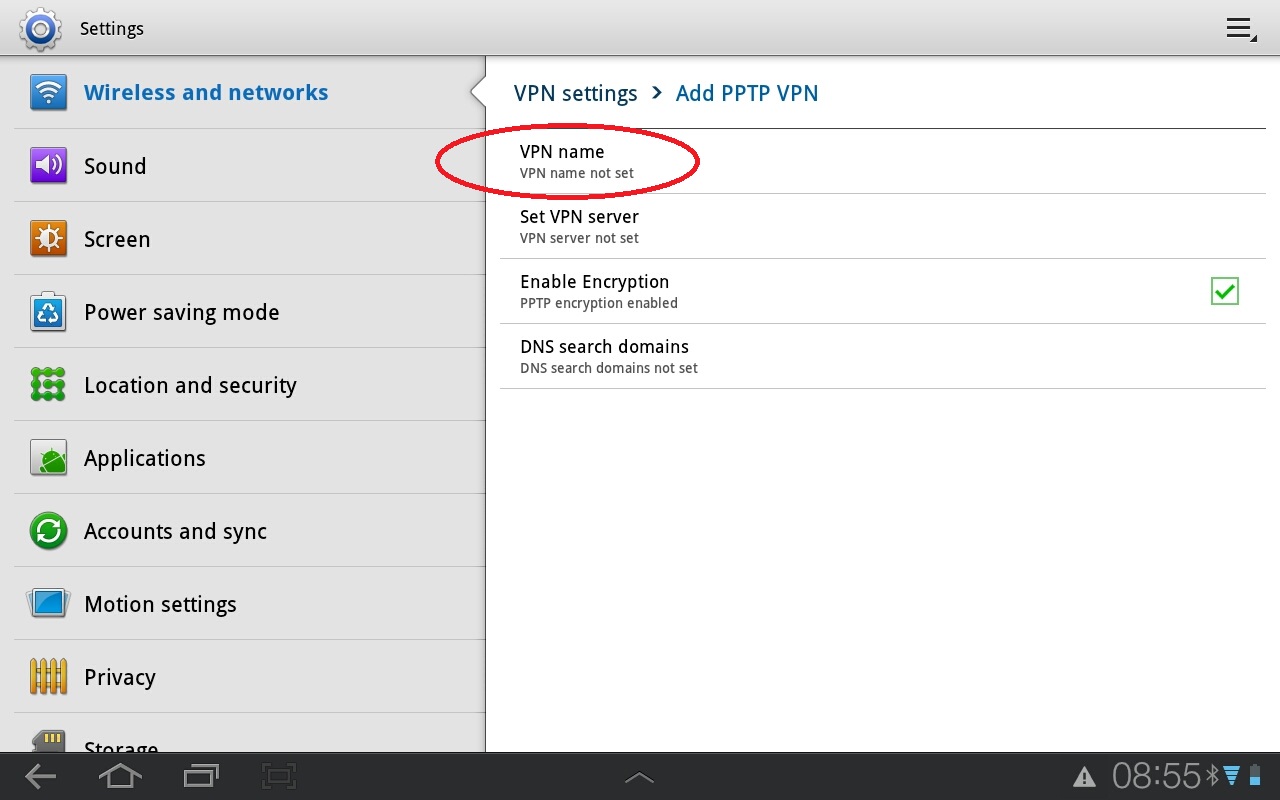
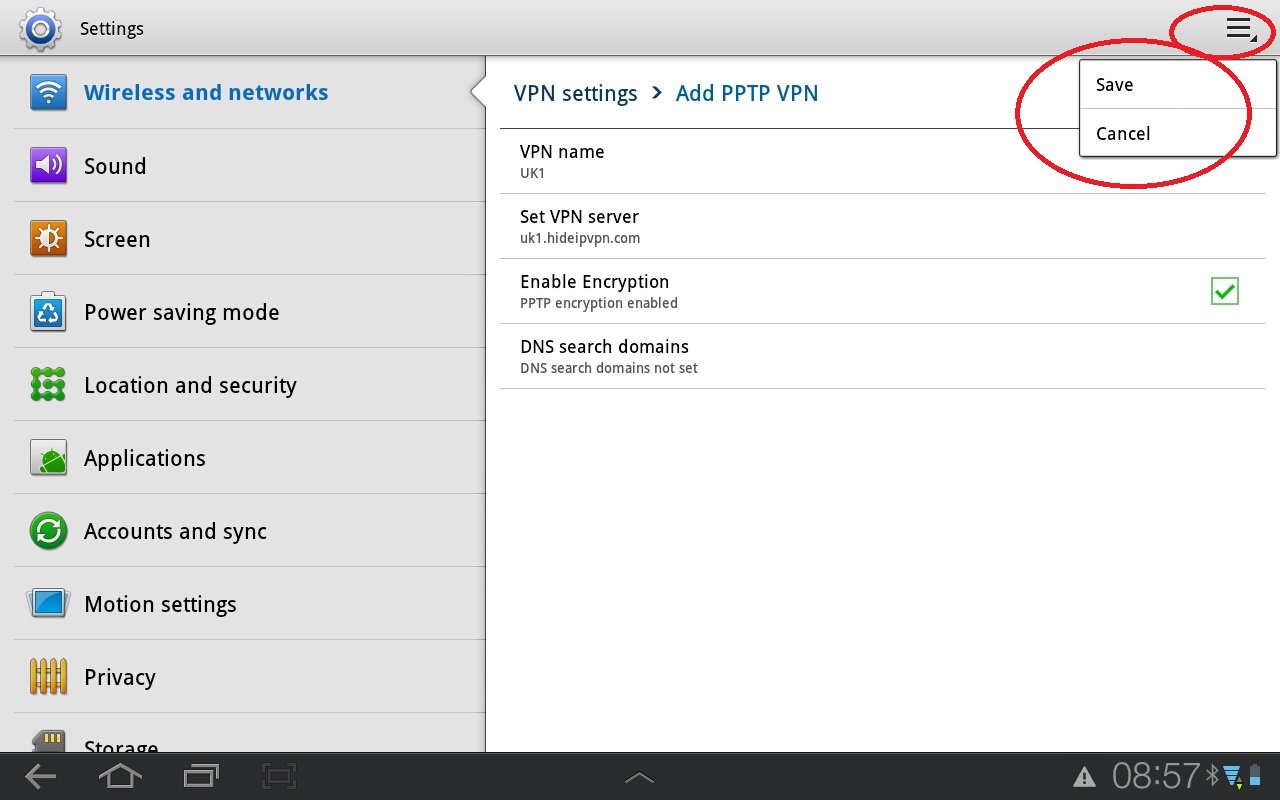
Choose “VPN Name” in here you can put anything that will allow you to know, which VPN server you are making a connection with.

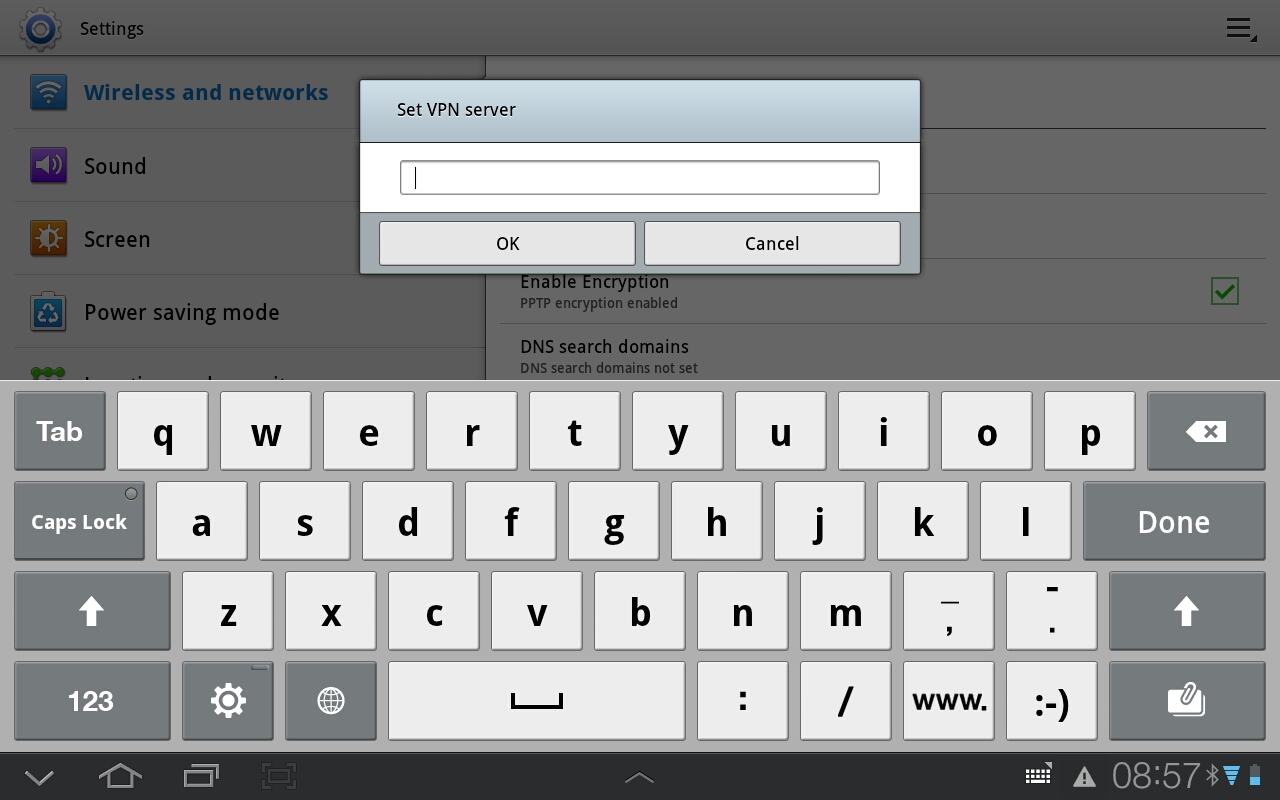
Next to go is “Set VPN server” where you will put a server address as provided by as in e-mail
DO NOT FORGET TO SAVE!!!
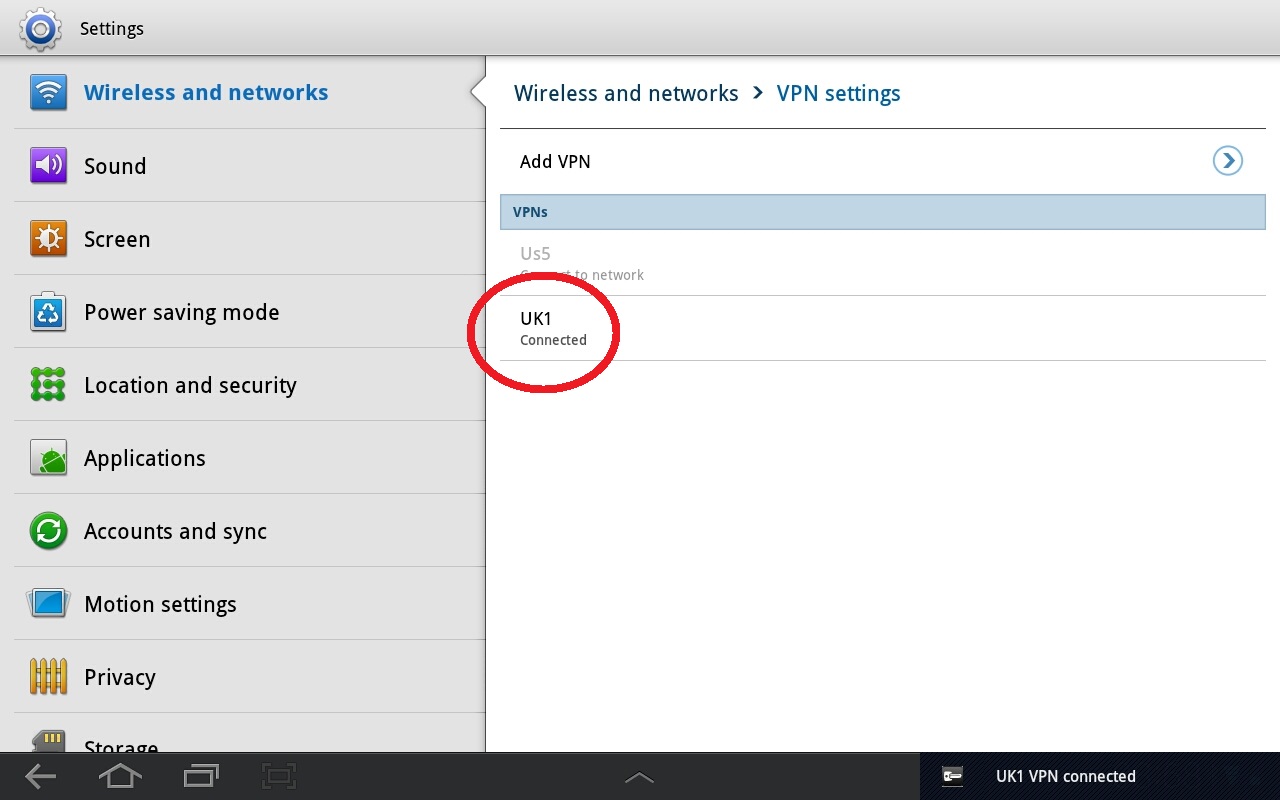
All that is left is to enter your user name (tick the box “Remember”) and password (read here to find out how to make your device remember the password) and Connect. Once connected…well, just see the screens at the very bottom – ENJOY! 😉



For information about how to watch Hulu (free), Netflix and use other services from US and UK we recommend to Google or use XDA Forums.