Follow this step-by-step tutorial to learn how to clear cache and cookies on Mozilla Firefox.
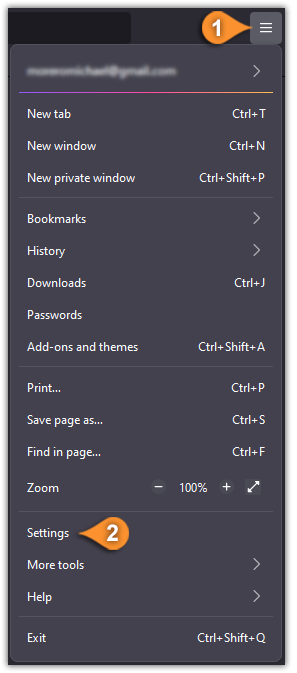
- Open Firefox on your Mac or PC then Click the menu button, this appears as three lines in the upper right corner (pin 1), and select “Settings” (pin 2).

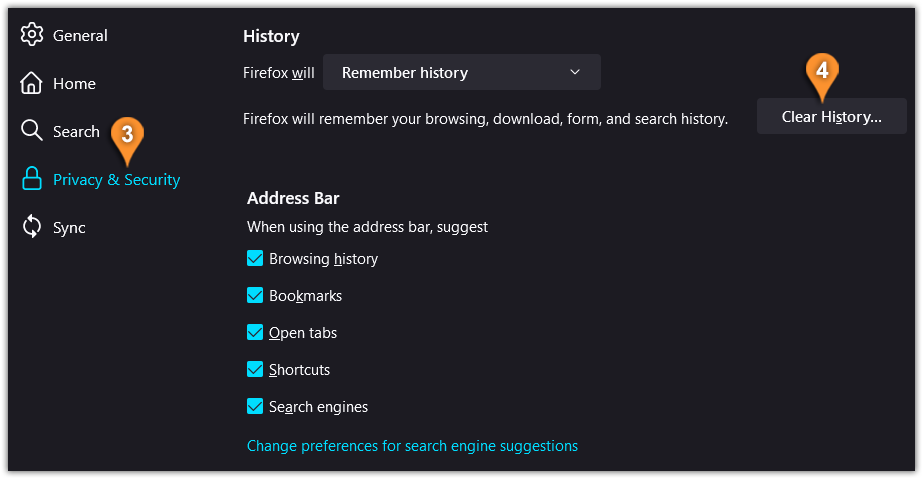
- Click on the “Privacy & Security” tab (pin 3), and scroll down until you find the “History” section then click on the “Clear History…” button (pin 4).

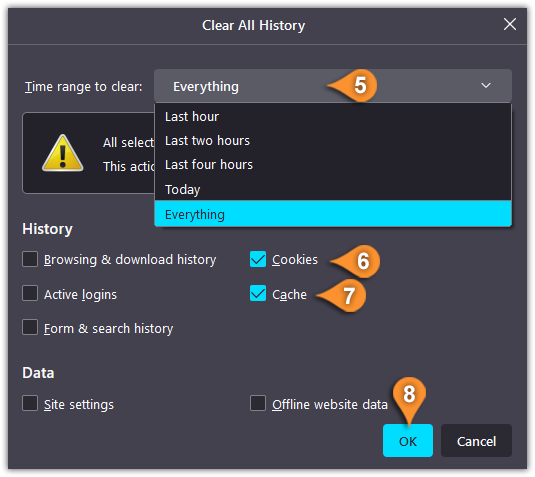
- On the next window, choose the “Time range to clear:” (pin 5), check the “Cookies” (pin 6) and “Cache” (pin 7) checkboxes, then click on “OK” (pin 8).

- Make sure to restart your Firefox browser.
For those who need an automated solution, you can also have Firefox clear cache and cookies when closing the browser:
- Click the menu button and select .
- Select the panel and go to the History section.
- In the drop-down menu next to Firefox will choose .
- Select the check box for Clear history when Firefox closes.
- Besides Clear history when Firefox closes, click the Settings… button. The Settings for Clearing History window will open.
- In the Settings for Clearing History window, put a check mark next to Cache.
- Click OK to close the Settings for Clearing History window.
- Close the about:preferences page. Any changes you’ve made will automatically be saved.
Clearing your Firefox browser’s cache will help you speed up the experience when it is noticeably lagging. The default setting for saving files in this situation is usually best, but there are other options available as well that may be more convenient depending on how long ago they were last used and what kind of device one uses to access their internet connection (PC or Mac).
If you are still facing issues clearing the cache on Firefox reach our support team.


