How to setup OpenVPN on Linux Ubuntu
Last updated on April 23rd, 2018 in Setup
 Welcome to HideIPVPN. This tutorial will guide you how to set up OpenVPN on Linux Ubuntu. Setup and Enjoy!
1. Click on “Search your computer and online resources”

2. Search for “Terminal” and click on it

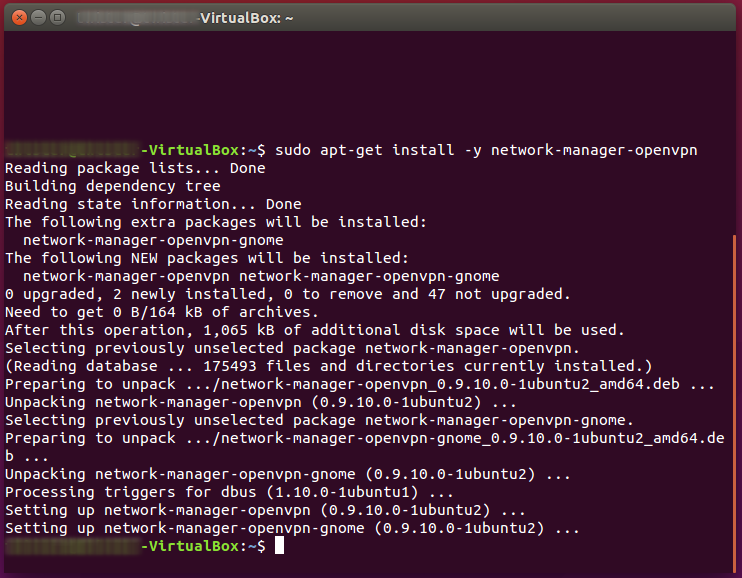
3. Install OpenVPN by entering the following command:
sudo apt-get install -y network-manager-openvpn

and
sudo apt-get install -y network-manager-openvpn-gnome
4. Once installed, close the Terminal application

5. Now you need to download your OpenVPN configuration files. Sign in to your Client Area. Then go to Packages (1) and select your active package (2).

2. Then scroll down and find “OpenVPN Config files”. Press on “Download for all operating systems” link (3) and save archive file on your device.

Important! You also need to download CA.crt file from Here.
6. Extract the content from .zip file to Desktop or a folder
7. Select “VPN Connections” (1), then click “Configure VPN…” (2)

8. Click “Add” (3).

9. Select “ Import a saved VPN configuration ” (4)

10. Select file to import with .ovpn (5) extension and the server name to which you want to connect, for e.g. we used CA1 config file. Then press “Open” (6).

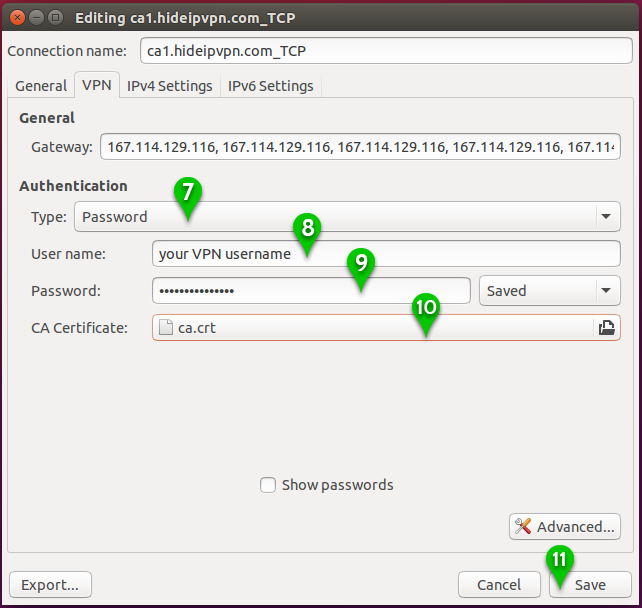
11. On next step do the following:

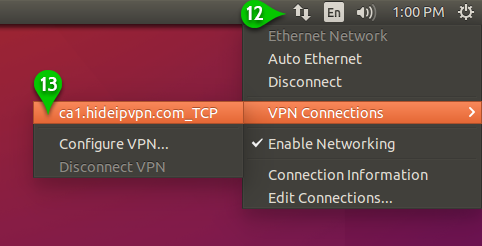
12. Click on the Network Manager (12) icon on your desktop bar Notification Area. Select “VPN Connections“, click on “ca1.hideipvpn.com_TCP” (13)

Now you’re connected

Enjoy your privacy!