If you want secure browsing on your Chrome device or browser, you can use our extension for Chrome.
In this tutorial, we will show you how to install HideIPVPN extension for Chrome and how to enable our proxy servers using the extension.
Table of contents
- A HideIPVPN account. If you don't have one, you can register for free VPN trial here
- Your Proxy/VPN username and password that you will use to sign in to this extension. You can find these credentials in Client Area -> Packages -> click on your package name
Add HideIPVPN extension to Chrome
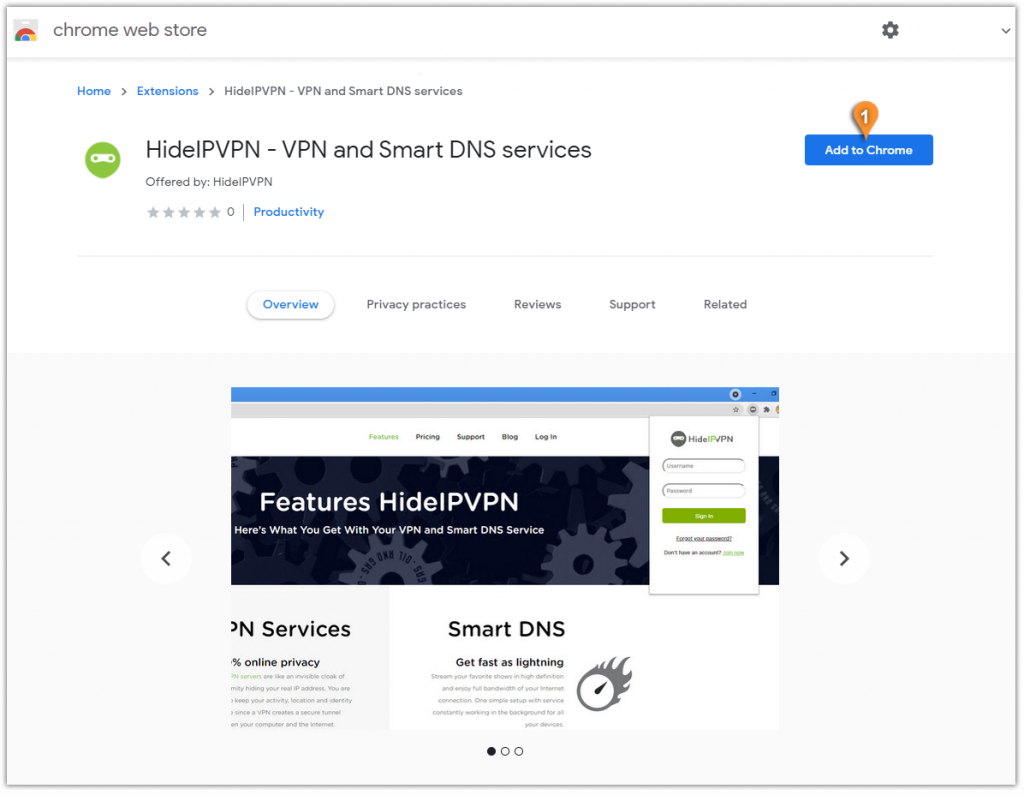
- First of all, you will need to Go to the Chrome Web Store, search for the “HideIPVPN - VPN and Smart DNS service” and click on Add to Chrome (pin. 1).
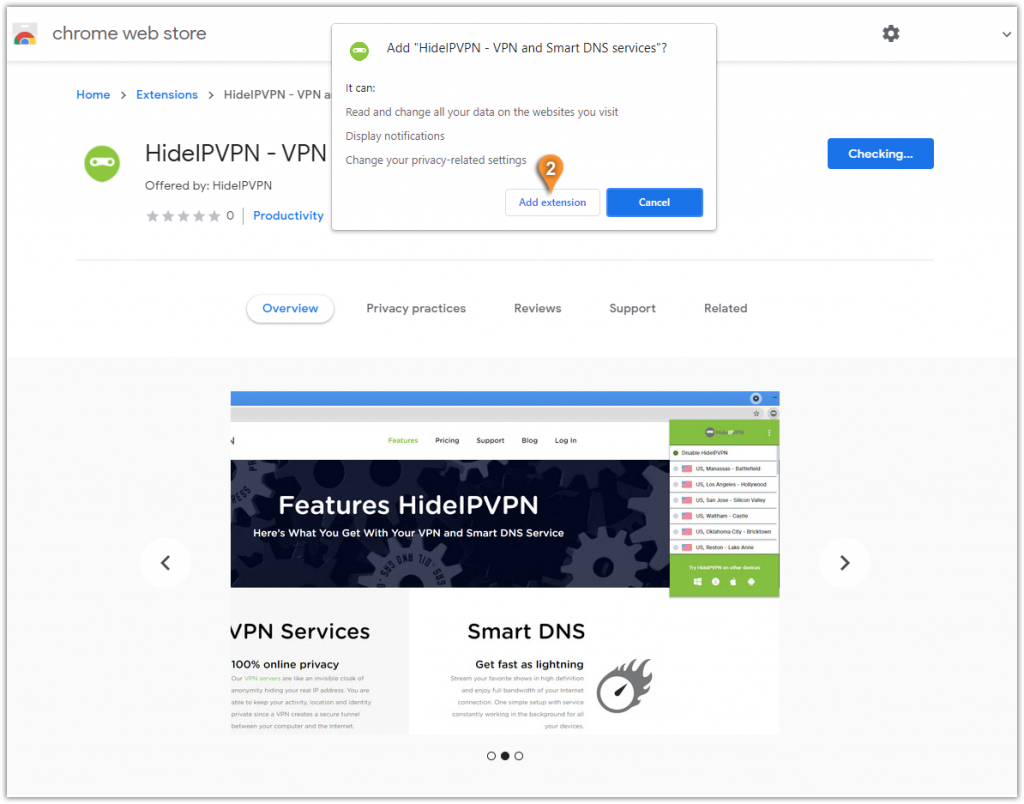
- Press “Add Extension” (pin. 2)


Enable Proxy
- Find and click on the HideIPVPN icon (pin 3).
Type in your VPN username (pin. 4) and VPN password (pin. 5).
You can find your VPN username and password under your VPN package in your Client Area, by going to Packages - click on your VPN package - on the next page find your VPN Username & Password.
Click on Sign in (pin. 6).

2. Select a proxy server location and click on it (pin.7) to Enable the proxy.
To disconnect the proxy server, press the “Disable HideIPVPN” (pin.8).

Settings
- From the menu icon (pin. 9) choose Settings (pin 10).
- You can change the port number to one of these numbers: 3129, 8080 or 80 (pin 11)You can disable WebRTC option (12) to make sure your IP address is not leaked while using the HideIPVPN proxy servers.


It's as simple as that, no other configuration is needed.


