How to setup L2TP on Mac OS X
Last updated on January 24th, 2018 in Setup
This tutorial will show you how to set up L2TP on Mac OS X (and compatible with OS X Yosemite, OS X Mountain Lion and Mavericks). It is very simple to setup L2TP on Mac OS X. Just follow the steps bellow.
Important:For an easier and faster connection we recommend you to use our free HideIPVPN software. Also check how to setup an use our VPN and Smart DNS software for macOS.
Note:Before start, you need to have an active VPN account, if you do not have one follow the link –
Get FREE VPN trial account!
1. Go to main menu and select System Preferences… (1)

2. Then choose Network

3. Press “+” to add new connection (3).

4. Interface select VPN (2). VPN Type select L2TP over IPSec (5). And give a name to this connection, for example: HideIPVPN L2TP (6). Then press Create (7).

5. In Server Address box introduce the server name you want to connect (8), for example: us1.hideipvpn.com, u2.hideipvpn.com, us3.hideipvpn.com, and so on. Type your VPN username (9) and press on “Authentication Settings…” button (10).

6. Type your VPN Password (11) and Shared Secret which is “hideipvpn” (12). Then press OK (13).

7. Once done, click on “Advanced…” button (14)

8. Check all session options as it shown in the image bellow (15).

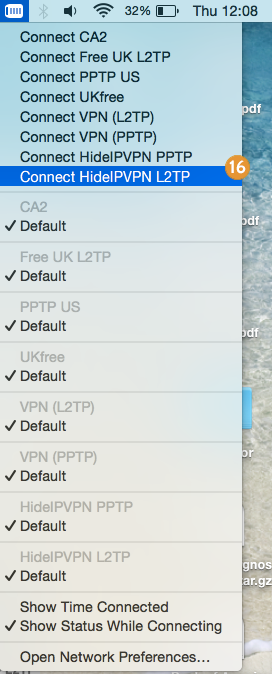
9. Now you must be able to connect. Select from the list of connection your new HideIPVPN L2TP (16).

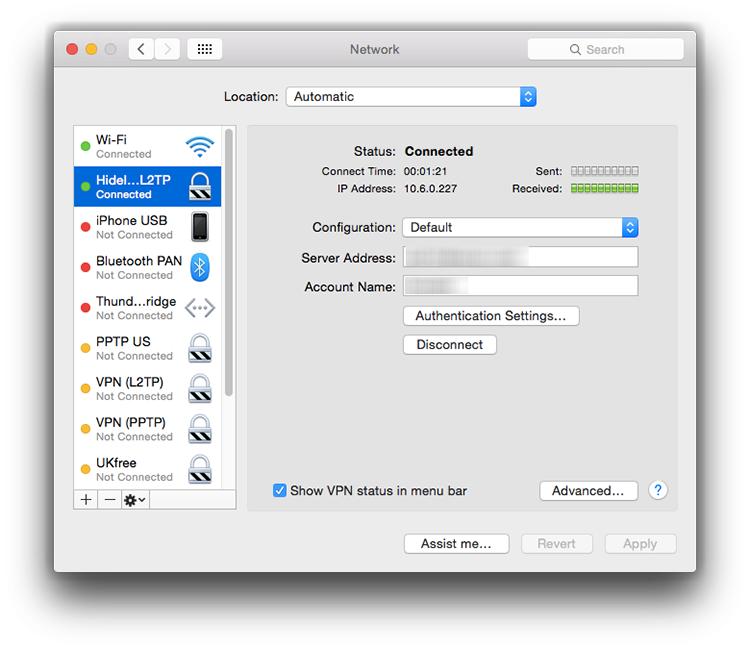
10. Check you connection status in Network Settings.

Now, your L2TP VPN on Mac OS X should be fully functional. If you run into any problems just contact our support team and we will be happy to help. Remember, that using VPN on any device increases your privacy, anonymity and security of your data. It is also a great way to unblock geo-restricted online services.
To try our VPN service simply click button below to register – no credit card required, no commitment – satisfaction guaranteed!