HowTo: Mac OS X PPTP VPN Setup Tutorial (Free Accounts)
Last updated on October 12th, 2010 in Setup
The following instructions go step-by-step through the creation process of your VPN connection.
First, click on the Apple on the upper hand corner of the screen. Then click on System Preferences.
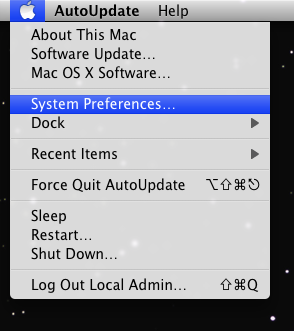
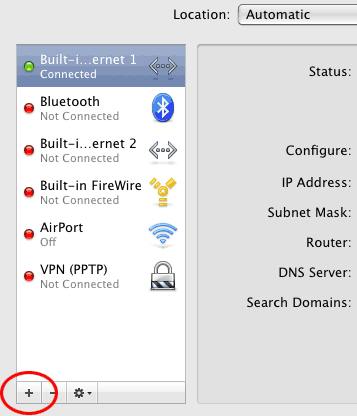
 In System Preferences click on the Network icon. When the network screen pops up, click on the “+” icon in the lower left hand corner of the screen. (you must have admin privileges)
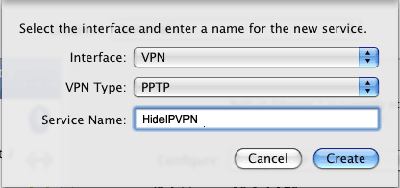
The new network screen will pop up. Under the Interface drop down list select VPN. Under the VPN Type drop down list select PPTP. In the Service Name field you can type anything you want, we recomend that you call the service HideIPVPN. Click Create.
The settings for the new VPN connection will now be displayed. In the Server Address field type:
Important! If you are located in a country where our site is blocked (like China) make sure your read the following post: Special VPN Settings For Chinese Users.
In the Account Name field type your HideIPVPN username.
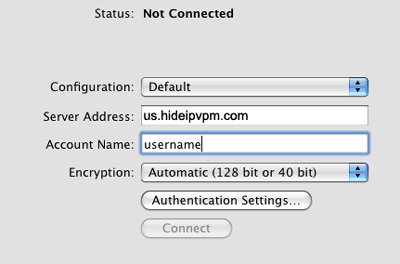
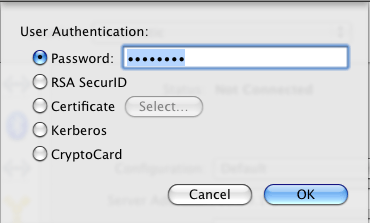
Click on the Authentication Settings… button. When the authentication settings windows comes up select the Password Radio button and enter your HideIPVPN password in the box. Click Ok.
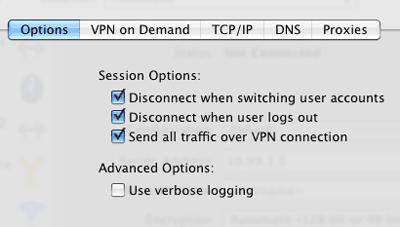
Click on the Advanced button. Check the Send all traffic over VPN connection checkbox. Click Ok.
You should now be able to connect to the VPN connection.
Important!
If you get Could not negotiate a connection with the remote PPP server error read the following post: VPN Howto: Linksys + DD-WRT + PPTP + Mac OS X Client.