 This is a short tutorial about how to setup Smart DNS on Asus router. We hope that those of you, who are using Asus routers and our Smart DNS service will find this instruction useful.
It is very easy to change DNS address and use Smart DNS on Asus router. Here is what you need to do.
Steps to setup Smart DNS on Asus router:
Log in to your router to start setup. Then follow next steps.
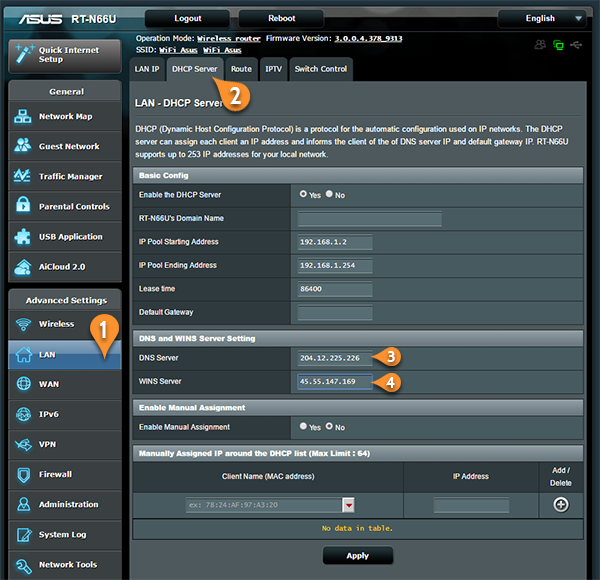
Click on “LAN” (1) tab as it is shown in the image bellow. Further select “DHCP Server” (2) tab. Under “DNS Server” (3) and “WINS Server” (4) type our DNS servers.
Click here to check HideIPVPN DNS server addresses. Once you’re done click on “Apply”

To find out what sites and services are unlocked via SmartDNS, follow the link. And do not forget to update your IP address before you start using the service.
With all that done all your devices using your home Wi-Fi can now benefit from Smart DNS service.
My router is different – how do I setup Smart DNS?
As you know there are many different routers in use and as much as we would love to we are not able to prepare such tutorial for every single model – to see what we can do about it, please follow this link.


